
The ultimate guide for installing East Asian languages support for legacy Windows and Mac OS Classic
Sometimes, my blog will have some texts displayed in east Asian languages (mostly Japanese).
In the Legacy version, said posts will display an alert box, warning that if you’re browsing the site with an old operating system, strange text may appear. But if you can browse this version without any issue, you have nothing to worry about, since your browser has full support for East Asian languages already.
This post will continue assuming you’re running an old operating system (e.g. Windows 9x, Windows XP, or Mac OS Classic).
Once you’ve installed support for these languages, check the About ruby text section of this post to check if the text is displayed correctly.
Windows
This covers the following versions:
- Windows 9x: Windows 95, 98 and Me.
- Windows NT: 4.0, 2000 and XP.
Windows 9x and NT4.0 (online)
Although currently in a very early state, it is possible to add support for East Asian languages through the archival project called Windows Update Restored. These are updated versions of the offline installers provided below, and are applied in nearly the same way as the days when the Windows Update feature was first introduced with Windows 98.
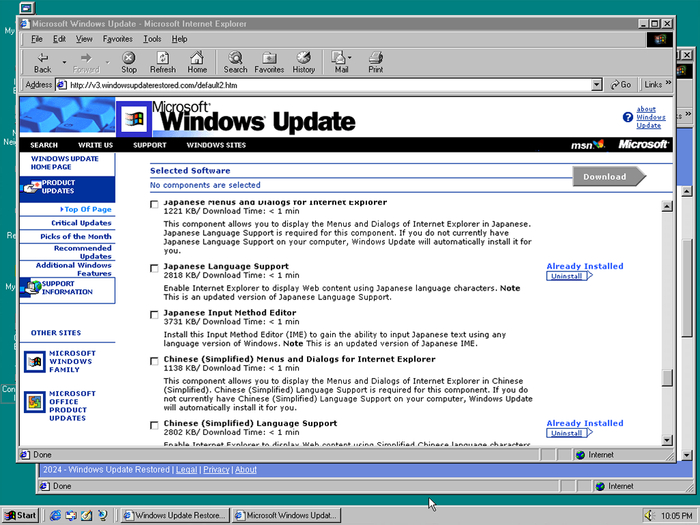
Note that there are many versions of Windows Update, each compatible with a set of different versions of Windows, and only Internet Explorer 4 through 6 will work. You will have more luck finding the language installation files in the English versions of Windows.
Windows 9x and NT4.0 (semi-offline, recommended)
This customized installer of Internet Explorer 5.5 comes with a copy of the updated versions of the language packs as shown above.
- Mount the ISO image in your system and extract the files on the specified path. Do not change this.
- If prompted to remove the current language version, ignore it and press “Yes” to continue.
- Select “Minimum installation, or customize your browser…” and click on Next.
- Scroll all the way down and check the boxes for Display support for Japanese, Korean and Chinese (Traditional) and (Simplified). Do not tick on anything that is in bold text other than the language support.
Windows 9x and NT4.0 (offline)
If the method above doesn’t work, I have uploaded an archived version of the East Asian language installers for Windows 9x and NT 4.0, although I only tested it with Windows 98, it should also work on 95 and NT.
- Mount the ISO image in your system
- Run the installers one by one.
- Restart the system.
These aren’t as updated as the other online methods
Windows XP
- Insert the Windows XP installation disc in your system.
- Head to Control Panel > Date, Time, Language and Regional options and select the Regional and Language settings. In the classic view, look for the latter.
- In the Languages tab, check the Install files for East Asian languages.
- Reboot.
Mac OS 9
This guide is taken from Nisus.com, so that you can check it from your legacy OS. This should also be possible in Mac OS 8, but I haven’t tested it.
- Double click the Mac OS Install icon on the Mac OS 9 CD.
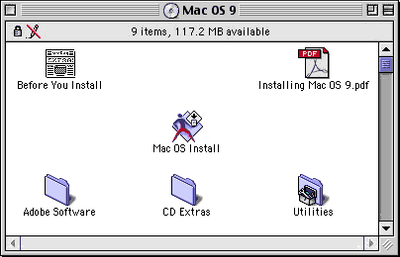
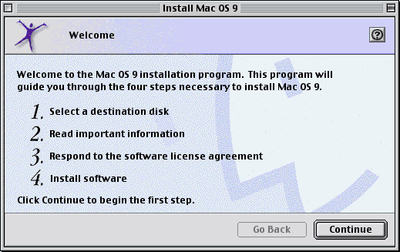
- You will see a “Welcome” window. Click “Continue”.
- Choose the hard drive on which you want to add the Language Kits. Make sure you uncheck “Perform Clean installation” in the “Options…” menu!
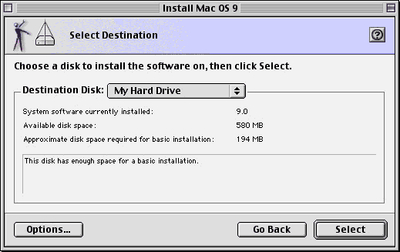
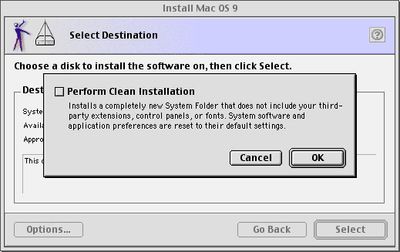
- Then click “Select”.
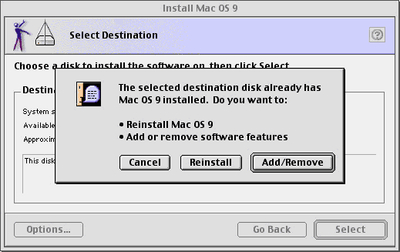
You see, the installer has checked and found that you already have Mac OS 9 on the system. You want to add software features to your System.
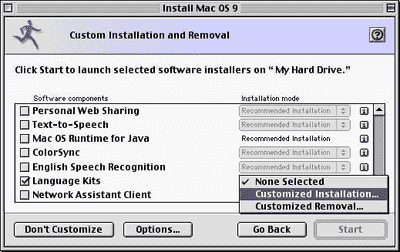
- Therefore, you click: “Add/Remove”. Now you see the “Custom Installation and Removal” window.
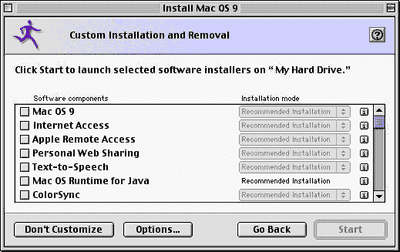
You have a lot of options here. But, all you want (now, for our purposes) is to scroll to near the bottom of the list where you’ll see “Language Kits”.
- Check “Language Kits” and notice that the pop-up menu to its right becomes enabled:
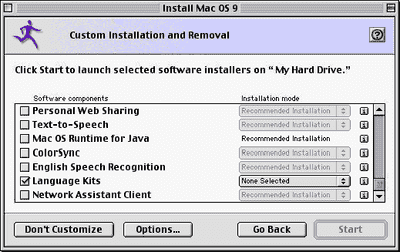
- Click the pop-up menu and choose “Customized Installation…”:
A new window opens in which you can check off the specific language kits you want to install (in this case, Japanese, Korean, Chinese using simplified characters and Chinese using traditional characters):
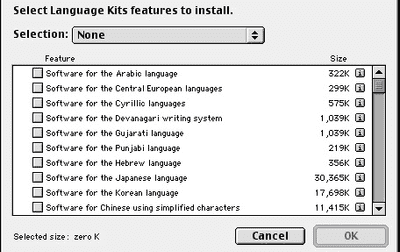
- After you check off the ones you want, click OK and then you’re ready to install the software.
About ruby text
Ruby text are annotations that are placed on top of Chinese, Japanese and Korean (CJK) characters to aid in reading them. However, among the browsers that support the legacy OSes mentioned above, only Internet Explorer 5.5 supports ruby text.
If your browser does not support ruby text, it will appear in this blog to the side of the CJK text.
Here are a couple of examples:
- 東京 is how Tokyo is written in Japanese.
- 北京 is how Beijing is written in Simplified Chinese.
- 臺北 is how Taipei is written in Traditional Chinese.
- 서울 is how Seoul is written in Korean.


